Tomatoes are the queen of the vegetable garden. Each year, gardeners strive for a bountiful harvest of beautiful, tasty fruit (yes, tomatoes are fruit). Through my own gardening experiences and observing the mistakes of others, I’ve come up with a set of key factors in tomato success.
The result is the following pontification that I call the “Ten Commandments of Tomato Success.” Like the “original ten,” folks who think these are optional are headed for disappointment.
I. Select ye a site with full exposure to the sun.
Six to eight hours of full sunlight are important. Veggies grown for their fruit (tomatoes, peppers, eggplant, melons) or roots (carrots, turnips, radishes) require at least six hours of sunlight to produce the carbohydrates needed to make fruit and large edible roots.
You can grow a tomato plant in limited sunlight. You just won’t get many, if any, tomatoes. If you don’t have a reasonably sunny spot in your yard, grow your tomatoes in large containers placed wherever they can receive lots of direct sun-light.
II. Prepareth the soil well before thou planteth thy crop.
Success starts with the soil. A soil test is a good start to let you know which nutrients you need to add prior to planting. In the absence of a soil test, mix two cups of a complete fertilizer (four-to-six cups, if organic fertilizer) per 50 square-feet of bed area into the soil prior to planting.
Compost helps sandy soils hold moisture and nutrients and helps clay soils form a crumbly structure and drain better. If planting in a spot for the first time, mix two-to-three inches of compost into your soil four-to-six inches deep. After that, one inch (twice per year) should be sufficient.
If you don’t want the labor of amending your soil, purchase a quality soil mix and fill a raised planting bed to a depth of 12 inches or more. A quality mix is a blend of topsoil and compost, and sometimes other ingredients. It is screened to remove any large chunks of woody materials. New mixes often take some time to produce good plant growth and yields. Adding a nitrogen boost can help avoid this delay.
Although we’ve been assured the “40 days and 40 nights” ordeal will not be repeated, we often experience slightly less in many parts of East and Southeast Texas. Even central parts of the state have their periodic deluges. Tomatoes detest “wet feet.”
In heavy clay soils and low-lying poorly drained areas, build raised planting beds to improve drainage. Raised beds also warm up faster in the spring, promoting faster early growth.
III. Thou shalt select only tomatoes designed for your location.
One of the most important factors in choosing a tomato variety is its “days-to-harvest interval.” Here in the southern U.S., we have two short tomato seasons, spring and fall, wedged in between the last spring frost and months of blazing-hot weather.
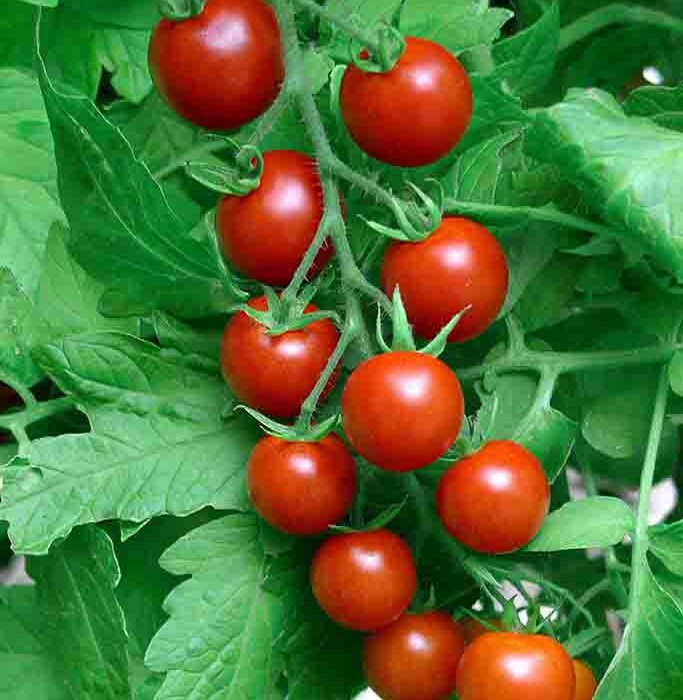
Tomatoes do not set well in cold or hot temperatures. We need varieties that will reach harvest quickly. Small-fruited types, such as cherry and grape tomatoes, do set fairly well in hot weather, but the skin tends to get rather tough.
As a general guide, choose varieties with days-to-harvest intervals of 65 to 75 days. That allows time to set and ripen a bountiful crop.
It makes sense to choose resistant varieties to lower the number of potential problems that your tomatoes might face during the season. The letters after the variety name indicate its resistance to diseases. For example, “VF1F2NTA” indicates resistance to verticillium wilt, two strains of fusarium wilt, root-knot nematodes, tobacco mosaic virus and alternaria.
Build your garden around the old-faithfuls, such as ‘Celebrity’, but don’t just plant one variety. Hedge your bet by including two or three proven varieties and some newcomers. I always try a few new varieties. Over the years, many of those experimental choices have moved into the ranks of the old-faithfuls.
IV. Thou shalt not plant a plant too early, nor shalt thou plant it too late, but on its appointed day shalt thou plant it.
Our spring tomato-production window is limited, so don’t delay in getting the plants going in the garden. While the general recommendation is to plant around the last average frost date, I like to hedge my bet a little.
I usually grow my own transplants so that I can grow some varieties not available in local garden centers. I start my seeds about two-and-a-half months prior to my last average frost date and move the transplants from their small seed-starting cell into four-inch pots and then gallon pots as the plant gets larger. A quality indoor-lighting setup can help prevent the plants from becoming spindly.
By the time I plant them in the garden, they are often producing their first blooms. For an earlier start, you can cover the planting row with clear plastic supported by PVC hoops, which provide frost protection and increased soil warmth. A milk jug or two of water set up against the plants can provide additional protection beneath the cover. Open the ends of this tomato tunnel during the day to allow excess heat to escape.
By getting an early start you can gain two-to-four weeks of productivity, plus the all-important bragging rights for the season’s first tomatoes.
If you purchase your transplants, get them early. Some garden centers always put tomato plants out earlier than folks should be planting them. Go ahead and buy them and then grow them (as I mentioned above) by keeping them indoors at night and moving them out in the sun on mild days.
At planting, gently firm the soil around the roots. Lay lanky plants on their sides in a shallow trench and bury the stem, leaving the top four-to-six inches to stick out of the soil. The stem will form roots underground. Form a circular berm of soil around the plants for early watering.
V. Faithfully feed the growing crops under thy care.
Keep your plants growing healthy and vigorous. Modern tomato varieties are racehorses that will produce bountiful crops if sustained with optimum nutrition. Start by fertilizing the new transplants at planting by using a soluble fertilizer or a fish-emulsion and seaweed solution. Repeat this twice more at one-week intervals.
When the first fruit forms, give the plants another application of dry fertilizer in a 3-1-2 or 4-1-2 ratio. Apply a half cup of synthetic or one and one-half cups of organic fertilizer in a two-to-three-inch diameter for each plant. Scratch it into the soil surface and water it in well.
A slow-release synthetic fertilizer (such as Osmocote) provides extended feeding. For organic gardening, choose a product such as 8-2-4 or 6-2-4, or create a blend of three parts cottonseed meal with one part blood meal.
When our kids were young, we mixed in some “Poo de Bonet” (pronounced boh-NAY), a wonderful, naturally pelletized fertilizer the kids gathered from beneath their rabbit cages. Tomato plants hop out of the ground with this spe-cial treat.
VI. Provide life-sustaining water to the growing crops under thy care.
Tomatoes need consistent soil moisture to perform their best. When they experience dry soil and significant wilting, their production drops. Fluctuations from wet to dry are the primary cause of blossom-end rot, especially early in the season.
Watering frequency will depend on the soil and the weather. Some wilting in blazing heat is normal, but they should regain their form in the evening if their soil moisture is adequate. Container-grown tomatoes are especially prone to drought stress due to their limited root system.
VII. Consider how forests and meadows cover their soil and diligently do likewise.
Wait to mulch the soil until the weather warms a bit in spring. Bare soil heats up faster, and thus early growth is better. When temperatures warm, lightly hoe any young weeds and then mulch the soil surface with two-to-three inches of shredded leaves or another organic material to block out light, moderate soil temperature in hot weather and prevent crusting and erosion.
I like to use four-to-six sheets of newspaper covered with shredded leaves. You can even remove the staples from copies of Texas Gardener to create mulch paper. Please note, however, that if you use articles that I wrote, you can reduce nitrogen fertilization by half.
VIII. Supporteth thy plants’ heavy-laden vines.
Tomatoes are vining plants, and even bush types benefit from some type of support. Supporting vines improves air circulation, minimizes diseases and can increase production of quality fruit.
Two common techniques for supporting tomatoes are staking and caging. A third technique, which I prefer, is to use a section of livestock panel leaned against iron fenceposts, with the base of the panel about two feet from the posts. The tomato plants are set between the row of posts and the base of the panel, and the growing shoots are trained up through the panels, forming a slanted wall of foliage. This technique is fast, easy and makes for quick cleanup and more compact storage than tomato cages.
IX. Pruneth thy plants as a good tomato vinedresser.
Left unpruned, tomatoes create a thick mass of vines that limit air circulation and increase disease problems. Spraying also is much more difficult.
Staking tomatoes involves removing all the sucker shoots and tying the central stem to a stake. The clusters that form don’t have the competition of a lot of other shoots and fruit, resulting in somewhat larger and earlier tomatoes.
Cage culture involves removing the first few suckers and then allowing the vine to produce side shoots and fill the tomato cage, with some moderate suckering to increase sunlight reaching into the plant and to promote good air circulation. Caged tomatoes generally produce more fruit, but a little later than staked tomatoes. Secure the cages by tying them to a stake to avoid having them blow over in the wind.
The slanted livestock panel system involves some sucker removal and weaving of vines, as needed, to maintain a wall of foliage.
X. Thou shalt keep diligent watch for plagues of disease and pestilence.
Insects, diseases and spider mites are among the marauding hordes that attack our precious tomato plants and fruit. Aphids, caterpillars, stink bugs, leaf-footed bugs and spider mites, are common pests.
Fungal and bacterial diseases can cause leaf spots that reduce carbohydrate production or vascular wilt diseases that result in plant death. Root-knot nematodes, most common in sandy soils, weaken plants, causing wilting, nutrient deficiency symptoms and reduced production.
When you can, choose tomatoes resistant to diseases and nematodes to avoid problems. Check your plants over frequently so you can take early action before a problem becomes an epidemic. Pests are easier to control when young and when the infestation is localized or limited. Early action also stops diseases, minimizing foliage loss. Your options are also greater at that time, especially if you are gardening organically.
Birds are another pest to be reckoned with, including our beloved state bird. Mockingbirds seem to enjoy taking a taste out of one tomato and then moving on to another one. Netting is an effective but tedious remedy, if applied correctly. Some gardeners use drawstring organza bags placed over individual fruit and clusters, and they claim they are ef-fective.
Four legged pests (such as squirrels) can also pose a problem. Controlling them can involve measures that neighbors and local law enforcement tend to frown upon.
These ten commandments of tomato-growing are a good starting point to achieve a bountiful harvest from your gar-den of Eden. Try these bits of wisdom out and if your garden is the best ever, just send me half the produce and tell eve-ryone you know you owe it all to reading Texas Gardener. On the other hand, if it flops, blame it on the weather, the bugs and that darn brown thumb.
By Robert ”Skip” Richter
Brazos County Horticulturist
Texas A&M AgriLife Extension Service